
Deploy MagicSync with Coolify
This guide explains how to deploy MagicSync on your own server using Coolify, an open-source platform for self-hosting applications.
Why Coolify?
- Simple deployment — Manage containers through a web UI.
- Self-hosted — Keep control of your own infrastructure.
- Cost effective — Use affordable VPS providers.
- Automatic SSL — Free HTTPS certificates via Let's Encrypt.
- Git-based updates — Redeploy automatically on push.
Prerequisites
Before you start, you will need:
| Requirement | Purpose | Examples |
|---|---|---|
| VPS or server | Host the application | Hetzner, DigitalOcean, Linode, Vultr |
| Docker | Container runtime | Installed by Coolify automatically |
| Coolify | Deployment platform | coolify.io |
| GitHub account | Source repository | github.com |
Recommended Server Size
- CPU: 2+ cores
- RAM: 4GB+ (8GB recommended for production)
- Storage: 40GB+ SSD
- OS: Ubuntu 22.04 LTS
Architecture Overview
The Coolify deployment consists of three services:
┌─────────────────────────────────────────┐
│              VPS Server                 │
│  ┌─────────────────────────────────┐   │
│  │            Coolify              │   │
│  │  ┌─────────────────────────┐   │   │
│  │  │   MagicSync Site        │   │   │
│  │  │   ghcr.io/leamsigc/     │   │   │
│  │  │   magicsync:latest      │   │   │
│  │  └─────────────────────────┘   │   │
│  │  ┌─────────────────────────┐   │   │
│  │  │   Python Backend        │   │   │
│  │  │   (built from source)   │   │   │
│  │  └─────────────────────────┘   │   │
│  │  ┌─────────────────────────┐   │   │
│  │  │   Database (libSQL)     │   │   │
│  │  └─────────────────────────┘   │   │
│  └─────────────────────────────────┘   │
└─────────────────────────────────────────┘
              │
              ▼
https://magicsync.dev:8888- Site — Pre-built Nuxt image from
ghcr.io/leamsigc/magicsync. - Python Backend — Built from the repository source.
- Database — Official libSQL server image.
Step 1: Install Coolify
1.1 Prepare Your Server
Provision a VPS with Ubuntu 22.04 and point your domain to the server's IP address.
This guide uses the example domain:
https://magicsync.dev:8888You can replace it with your own domain and port.
1.2 Install Coolify
SSH into your server and run the install script:
curl -fsSL https://cdn.coollabs.io/coolify/install.sh | bashThis installs Docker and Coolify. After installation, Coolify will provide a URL such as:
http://your-server-ip:8000Open it in your browser and create your admin account.
Step 2: Connect Your GitHub Repository
- In Coolify, go to Sources.
- Click Add GitHub App.
- Follow the steps to connect your GitHub account.
- Select the
leamsigc/magicsyncrepository.
Step 3: Create a Docker Compose Resource
- Go to Projects and select or create a project.
- Click Add New Resource.
- Choose Docker Compose.
- Select the
leamsigc/magicsyncrepository.
Use the Pre-Built Image
Replace the contents of the Docker Compose file in Coolify with the following:
services:
  site:
    image: ghcr.io/leamsigc/magicsync:v1.0.0  # Replace with the latest release tag
    depends_on:
      - db
      - python-backend
    environment:
      - NUXT_HOST=0.0.0.0
      - NUXT_PYTHON_API_URL=http://python-backend:8000
    volumes:
      - uploads:/usr/app/upload/files

  python-backend:
    depends_on:
      - db
    build:
      context: ./packages/python-backend
      dockerfile: Dockerfile
    command: ["uvicorn", "app.main:app", "--host", "0.0.0.0", "--port", "8000"]
    volumes:
      - uploads:/app/upload/files

  db:
    image: ghcr.io/tursodatabase/libsql-server:latest
    platform: linux/amd64
    volumes:
      - db-data:/var/lib/sqld

volumes:
  db-data:
  uploads:
Important notes about the image:
- Pin the tag: The example uses
v1.0.0. Replace this with the actual tag you want to deploy. Check the GitHub releases page for available tags. Pinning a tag makes deployments reproducible. - Avoid
latestin production: Usinglatestcan lead to unexpected updates. Always use a specific tag for production deployments. - Private registry: If the image is private, add your GitHub Container Registry credentials in Coolify under Settings → Private Registries.
- Cache: Docker may cache
latest. To force a fresh pull, redeploy or use a specific tag.
What this does:
- The site uses the pre-built image, so no build is required.
- The python-backend is built from
packages/python-backend/Dockerfile. - The db uses the official libSQL server image.
- Named volumes persist the database and uploads across restarts.
Step 4: Set Environment Variables
In Coolify, open the Environment Variables tab for your resource. You can paste the contents of .env-example directly — Coolify understands .env format.
Important: .env-example is written for local development. For Coolify, you must change localhost values to Docker service names and your real domain.
Required Environment Variables
# ============================================================
# APP CONFIGURATION
# ============================================================
NUXT_HOST=0.0.0.0
NUXT_APP_URL=https://magicsync.dev:8888
NUXT_BASE_URL=https://magicsync.dev:8888
NUXT_SESSION_PASSWORD=<generate-with-openssl-rand-hex-32>

# ============================================================
# BETTER AUTH
# ============================================================
NUXT_BETTER_AUTH_URL=https://magicsync.dev:8888
NUXT_BETTER_AUTH_SECRET=<generate-with-openssl-rand-hex-32>
BETTER_AUTH_URL=https://magicsync.dev:8888
BETTER_AUTH_SECRET=<generate-openssl-rand-hex-32>

# ============================================================
# DATABASE (libSQL via Docker)
# ============================================================
JWT=<generate-with-openssl-rand-hex-32>
SQLD_AUTH_JWT_KEY=<generate-with-openssl-rand-hex-32>
NUXT_TURSO_DATABASE_URL=http://db:8080
NUXT_TURSO_AUTH_TOKEN=<same-as-JWT>

# ============================================================
# PYTHON BACKEND
# ============================================================
NUXT_PYTHON_API_URL=http://python-backend:8000

# ============================================================
# LLM SERVICE (must match Python backend!)
# ============================================================
NUXT_LLM_JWT_SECRET=<generate-with-openssl-rand-hex-32>

# ============================================================
# PYTHON BACKEND ENV VARS
# ============================================================
# These are passed to the python-backend service.
# CORS_ORIGINS must be valid JSON with no trailing commas.
# Use your public domain as the primary origin.
CORS_ORIGINS=["https://magicsync.dev:8888"]
# If the Nuxt site calls the Python backend from inside Docker, also add:
# CORS_ORIGINS=["https://magicsync.dev:8888","http://site:3000"]
LLM_JWT_SECRET=<same-as-NUXT_LLM_JWT_SECRET>
BETTER_AUTH_URL=https://magicsync.dev:8888
BETTER_AUTH_SECRET=<same-as-NUXT_BETTER_AUTH_SECRET>

# ============================================================
# OLLAMA (optional — for local AI)
# ============================================================
# If you want local AI, add an Ollama service to the compose file.
# Otherwise, MagicSync can use cloud LLM providers via API keys.
OLLAMA_BASE_URL=http://ollama:11434
OLLAMA_DEFAULT_MODEL=qwen3.5
OLLAMA_EMBEDDING_MODEL=mxbai-embed-large

# ============================================================
# FILE STORAGE
# ============================================================
NUXT_FILE_STORAGE_MOUNT=./upload/files

# ============================================================
# EMAIL (Mailgun)
# ============================================================
NUXT_MAILGUN_API_KEY=<your-mailgun-api-key>
NUXT_MAILGUN_DOMAIN=<your-mailgun-domain>
NUXT_MAIL_FROM_EMAIL=noreply@magicsync.dev

# ============================================================
# AI SERVICES
# ============================================================
NUXT_OPENAI_API_KEY=<your-openai-api-key>
NUXT_PEXELS_API_KEY=<your-pexels-api-key>
NUXT_GOOGLE_GENERATIVE_AI_API_KEY=<your-google-api-key>

# ============================================================
# SOCIAL MEDIA OAUTH KEYS
# ============================================================
# Add the platforms you want to use.
# See /guide/platform-keys for each platform's setup.
Generate Secret Keys
Run the following on your local machine or server:
openssl rand -hex 32  # JWT
openssl rand -hex 32  # SQLD_AUTH_JWT_KEY
openssl rand -hex 32  # NUXT_SESSION_PASSWORD
openssl rand -hex 32  # NUXT_BETTER_AUTH_SECRET
openssl rand -hex 32  # BETTER_AUTH_SECRET
openssl rand -hex 32  # NUXT_LLM_JWT_SECRET
Important: JWT and NUXT_TURSO_AUTH_TOKEN must be the same value.
Changes from .env-example
| In .env-example | In Coolify | Reason |
|---|---|---|
NUXT_TURSO_DATABASE_URL=http://localhost:8080 | http://db:8080 | Docker services communicate by name |
NUXT_PYTHON_API_URL=http://localhost:8000 | http://python-backend:8000 | Docker services communicate by name |
NUXT_APP_URL=http://localhost:3000 | https://magicsync.dev:8888 | Your public domain |
Step 5: Configure the Domain
Set Your Domain
In Coolify, go to your resource settings and set:
Domain: https://magicsync.dev:8888You can also use a subdomain such as https://app.magicsync.dev.
Enable HTTPS
Coolify can automatically provision a free SSL certificate from Let's Encrypt:
- Go to Settings → SSL/TLS.
- Turn on Let's Encrypt.
- Click Save.
Step 6: Deploy
- Review all settings.
- Click Deploy.
- Wait for the deployment to complete (this may take a few minutes).
- Check the logs for any errors.
Once finished, open your browser and visit:
https://magicsync.dev:8888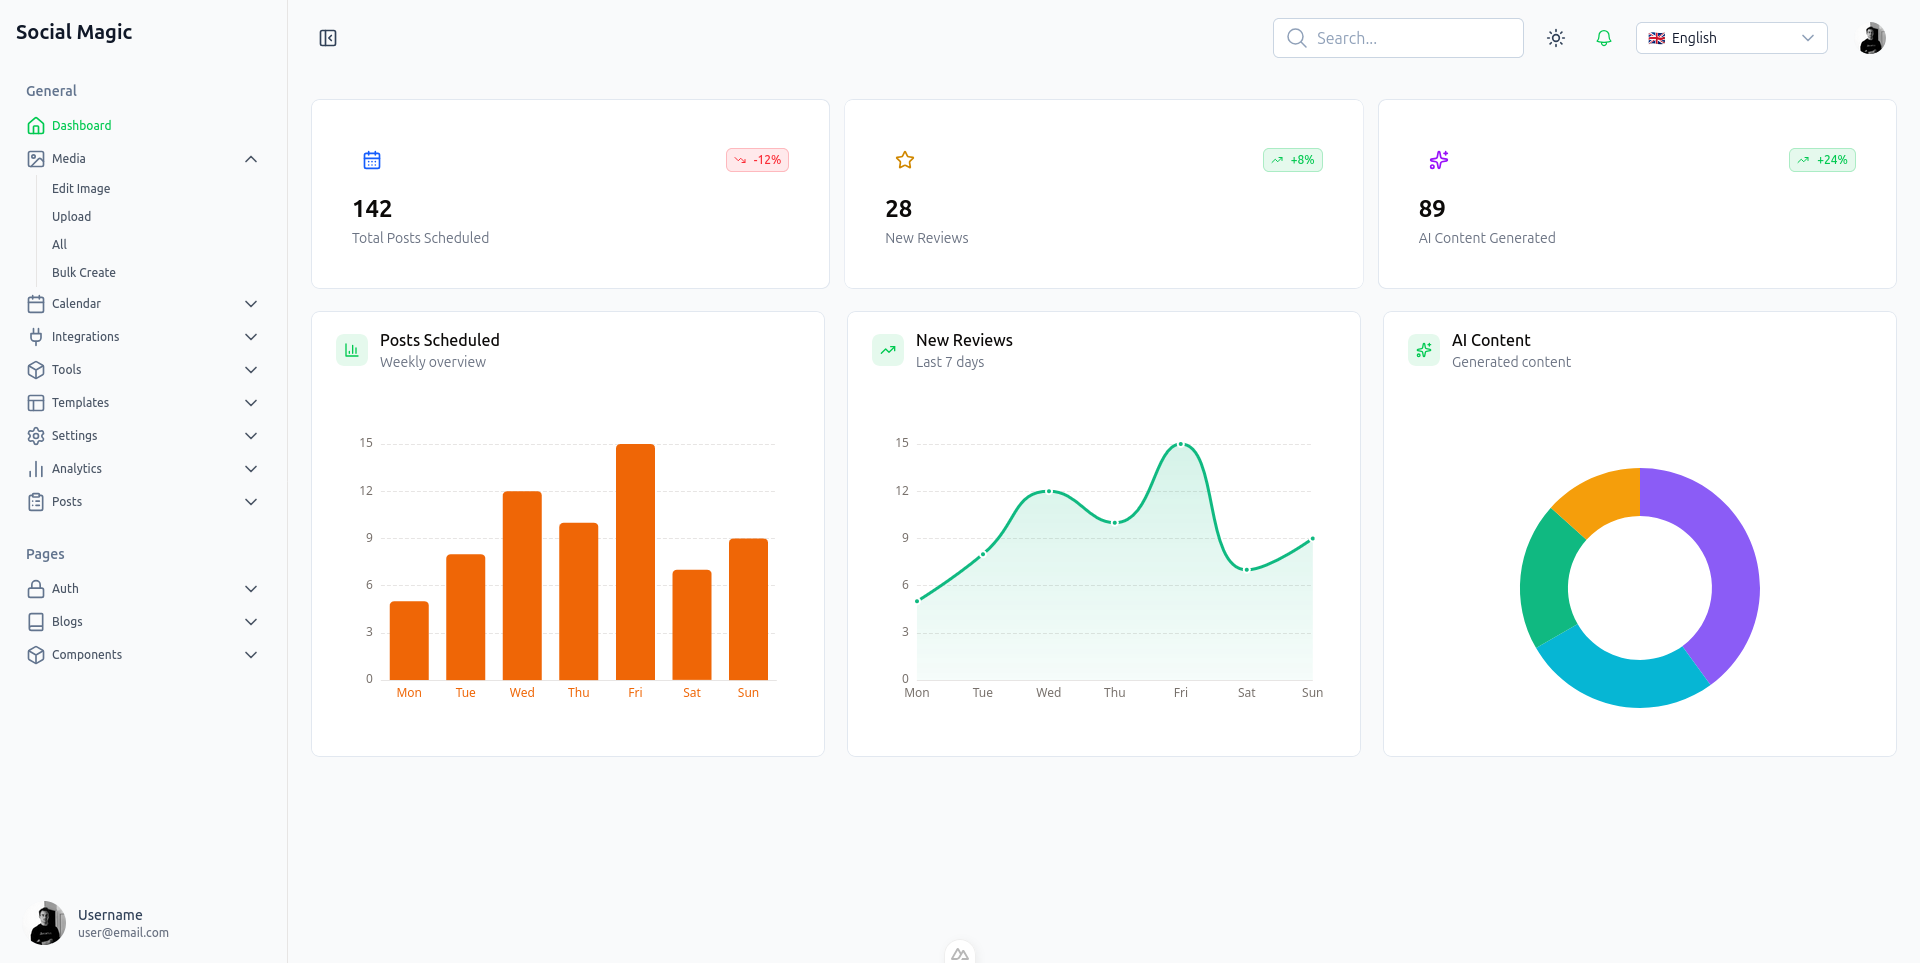
Updating Your Deployment
Automatic Updates
- In Coolify, go to your resource.
- Find the Webhooks or Auto Deploy settings.
- Enable auto-deploy on push.
Manual Updates
- Go to your resource in Coolify.
- Click Pull Latest Image or Redeploy.
Security Best Practices
- Use HTTPS with Let's Encrypt.
- Store all secrets in Coolify environment variables, never in your code.
- Use strong, randomly generated secrets.
- Enable 2FA on your Coolify account.
- Keep Coolify and your server updated.
- Back up your database regularly.
Troubleshooting
Site will not load
- Check that the deployment finished successfully.
- Verify the domain points to your server:
ping magicsync.dev - Check that the containers are running in the Coolify dashboard.
- Ensure the required port is open if using a custom port.
Environment variables not working
- Verify the variables are saved in Coolify.
- Redeploy after changing environment variables.
- Check for typos in variable names.
Database connection failed
- Check that the database container is running.
- Verify
JWTmatchesNUXT_TURSO_AUTH_TOKEN. - Verify
SQLD_AUTH_JWT_KEYis set. - Make sure
NUXT_TURSO_DATABASE_URLishttp://db:8080, notlocalhost.
Python backend cannot connect
- Verify
NUXT_PYTHON_API_URLishttp://python-backend:8000. - Check that the
python-backendcontainer is running. - Make sure
NUXT_LLM_JWT_SECRETandLLM_JWT_SECRETmatch.
SSL certificate will not generate
- Verify the domain points to your server.
- Make sure port 80 is open (required by Let's Encrypt).
- Try regenerating the certificate in Coolify.
Next Steps
- Self-Hosting Guide — Run MagicSync on your own server
- Docker Setup Guide — Learn more about Docker configuration
- Platform Keys Guide — Connect social media accounts
- AI Tools Guide — Explore the built-in tools